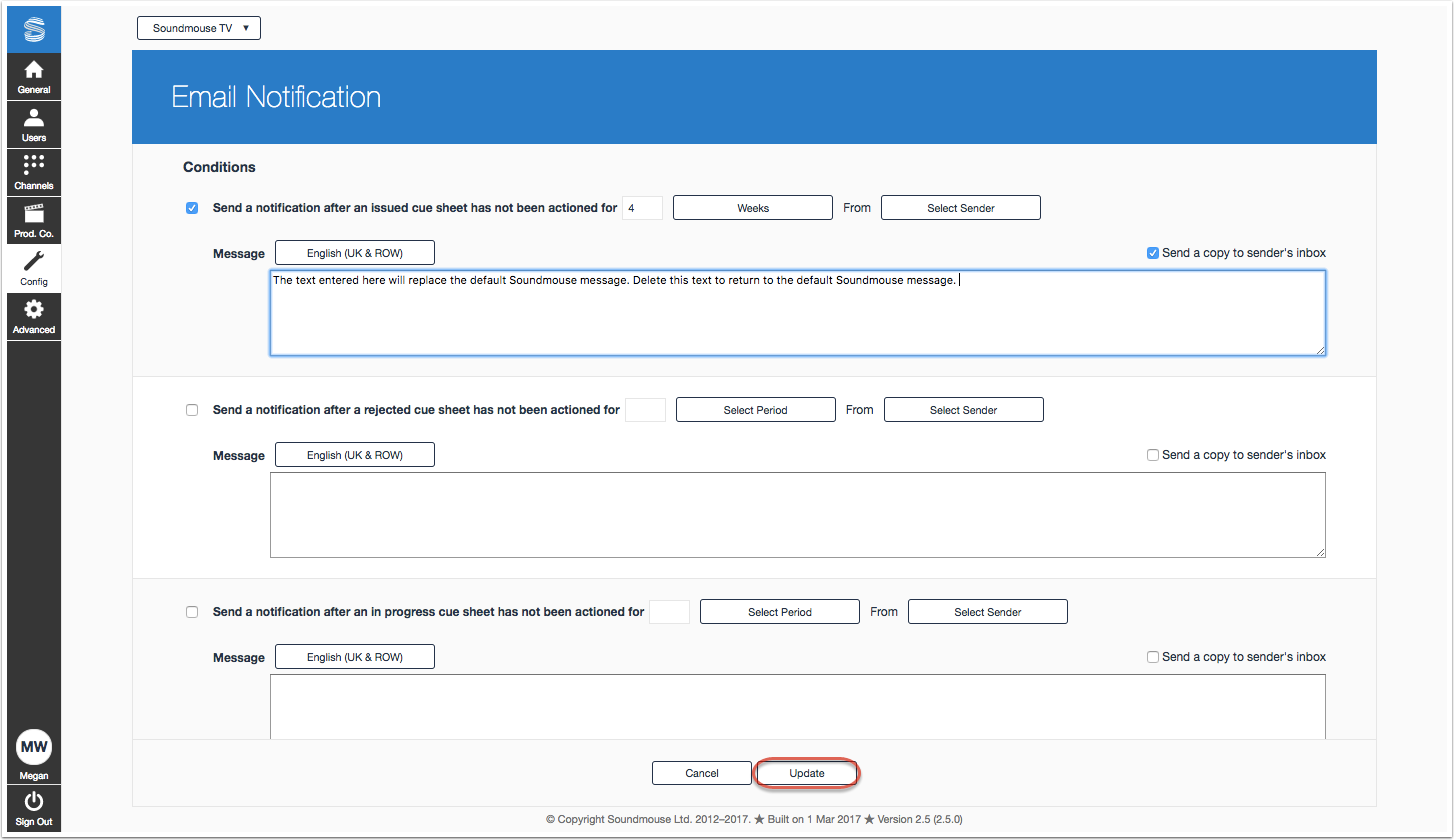
For Issued, Rejected and In Progress cue sheets, users can set up email notifications that will be triggered after a cue sheet has not been actioned for a specified amount of time.
Within Workspace Settings, Configurations, locate the section titled Audio Recognition. Then click on the edit icon to the right of Email Notification.
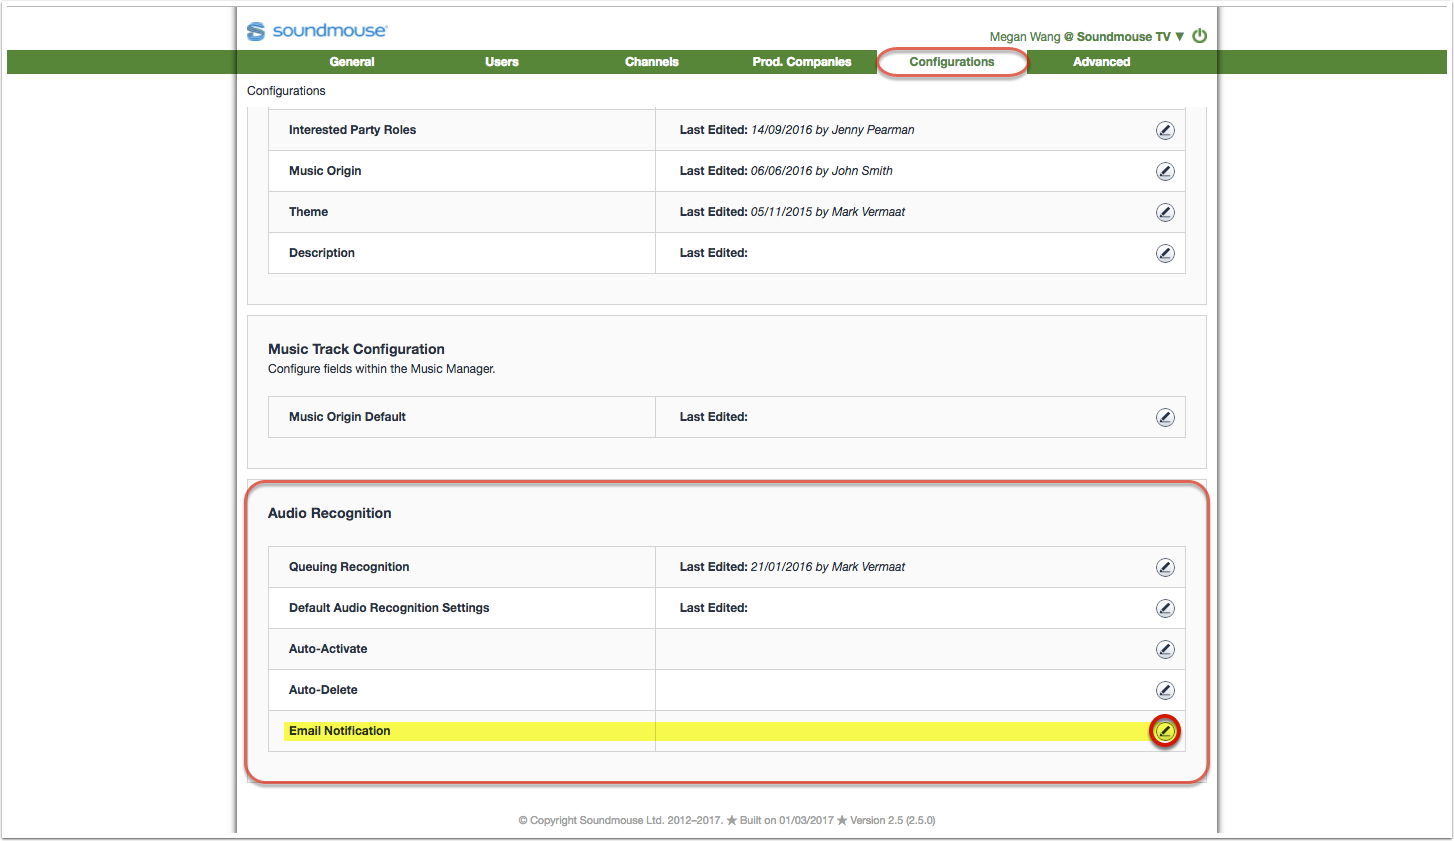
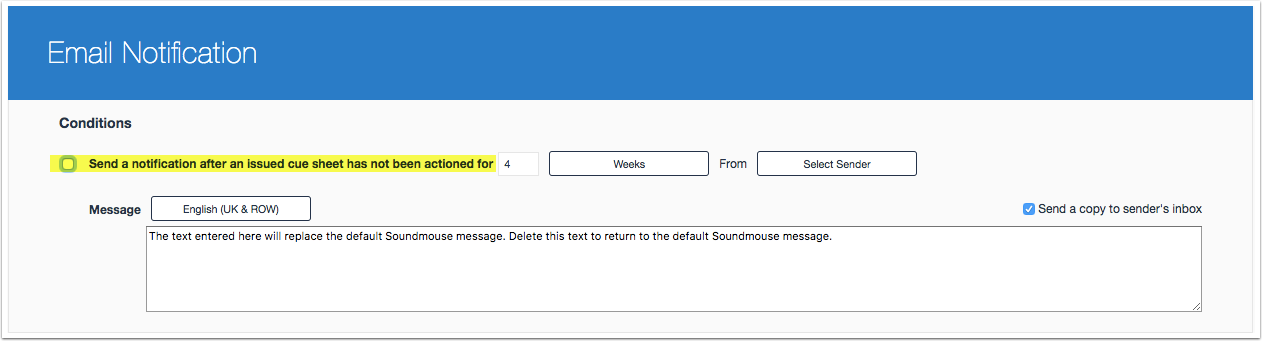
Conditions
When the defined conditions are met, an email notification is sent to all members of the workspace.
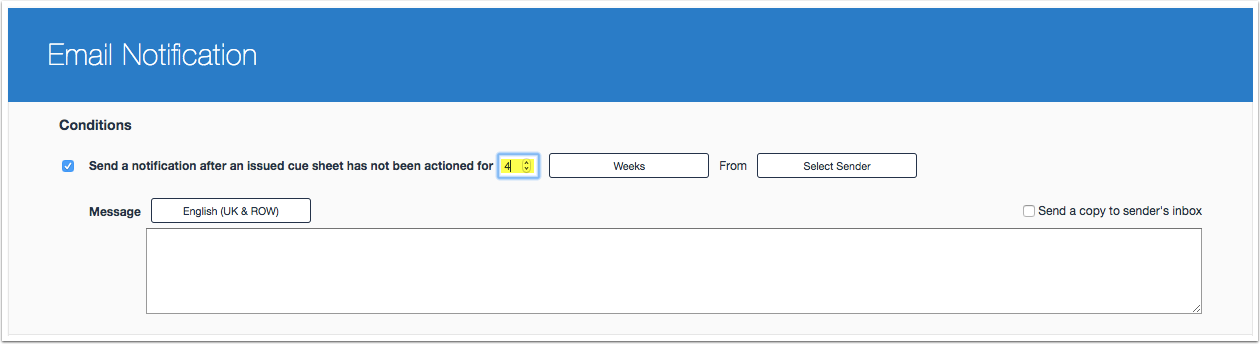
Tick the box for the appropriate condition (Issued, Rejected or In Progress cue sheets), click on Select Period and specify if the time period will be defined in days, weeks or months.
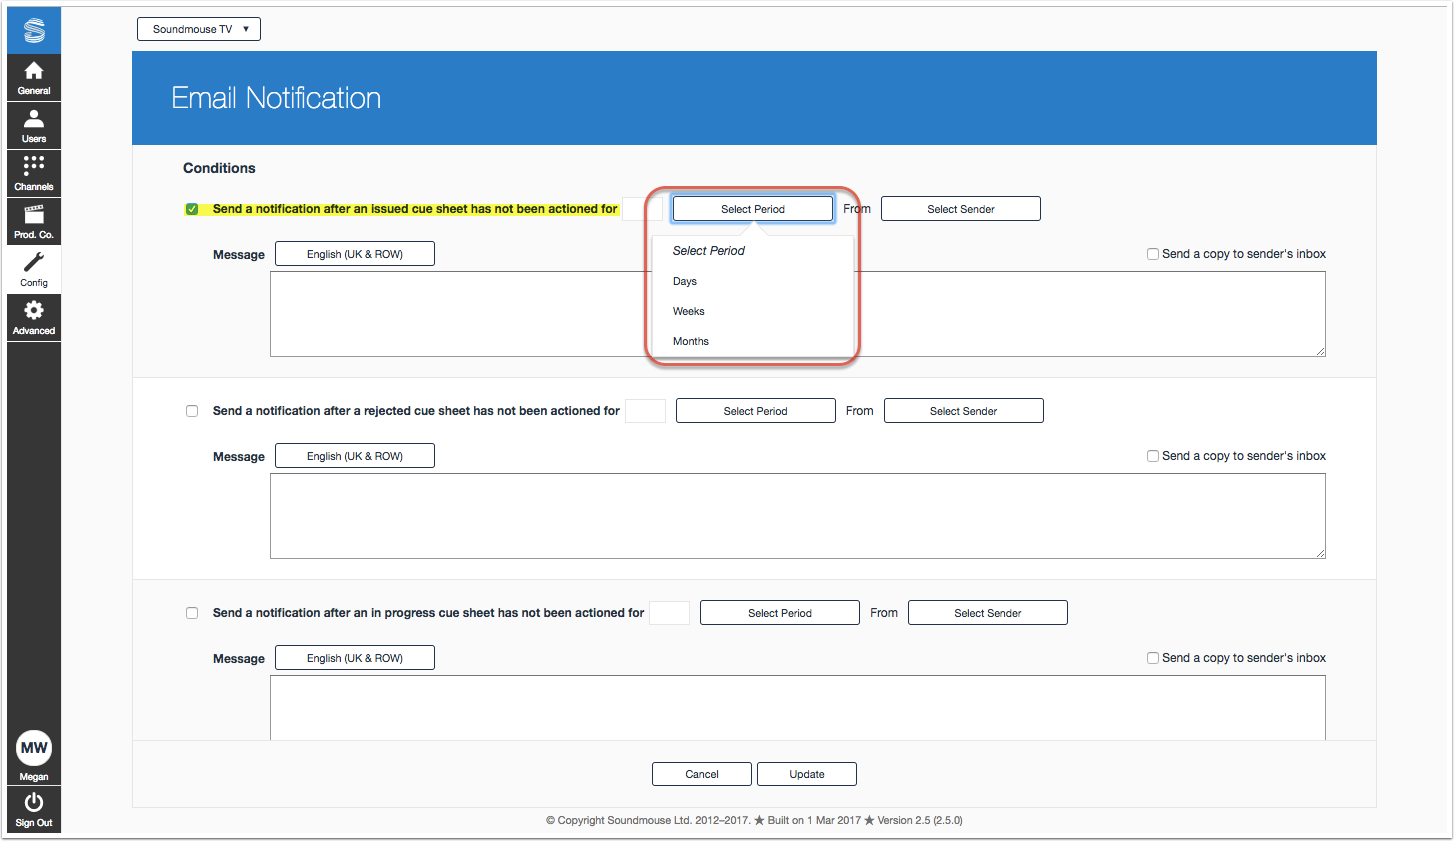
Users must define a time period. Enter the time period in the available box using the up/down arrows.
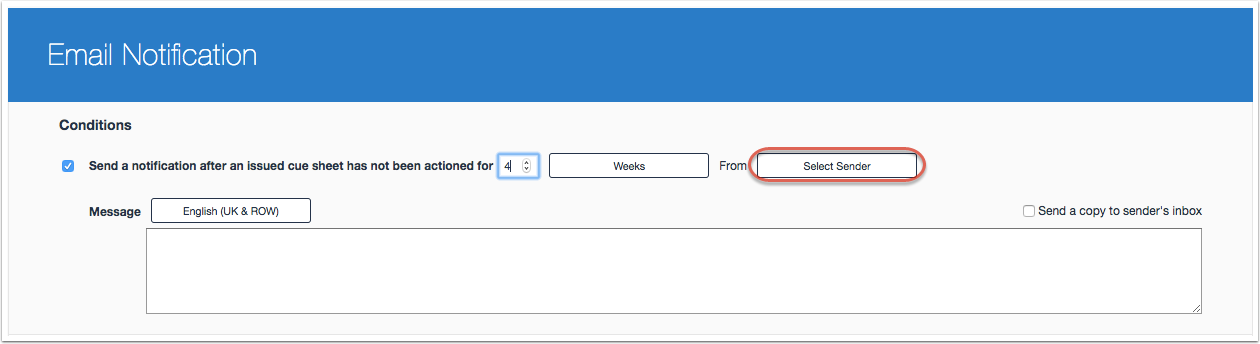
Select Sender (mandatory)
Click on Select Sender and select an email address from the list of those that have been verified and approved for use.
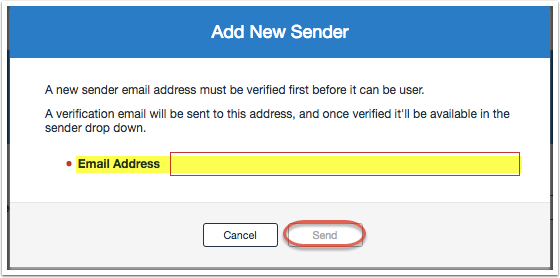
Add New Sender
Alternatively, click on Add New Sender to set up another email address. Before the new email can be used, it must first be verified.
Enter in the new email address and click on Send. A verification email will be sent to the account specified, and the user will be required to accept it before their email can be made available in the Select Sender dropdown.
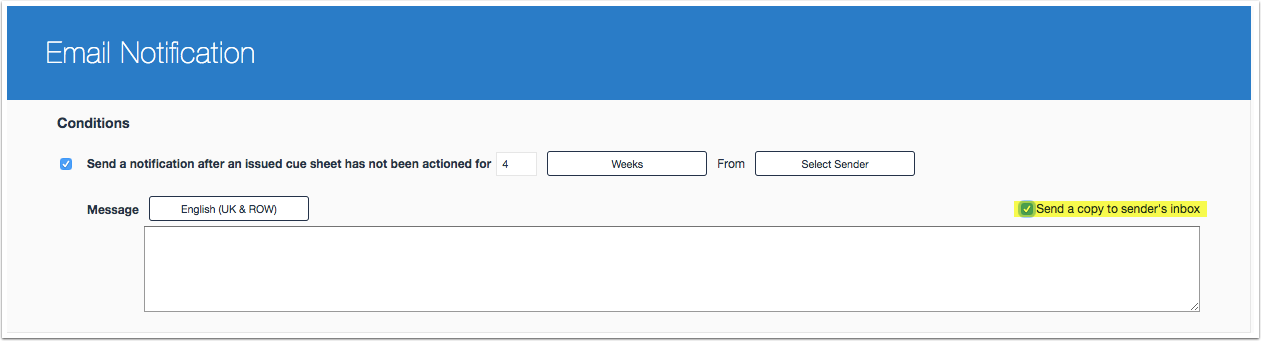
Send a Copy to Sender's Inbox (optional)
If you would like the sender to receive a copy of any email notifications sent, tick the box for Send a copy to sender's inbox.
Message (optional)
All email notifications contain a default message from Soundmouse. Entering text into the message box will overwrite the default message. These messages should not refer to a specific company, production or individual.

Translations into other system-supported languages can be added. Click on the language button, make your selection and enter your message in the box.
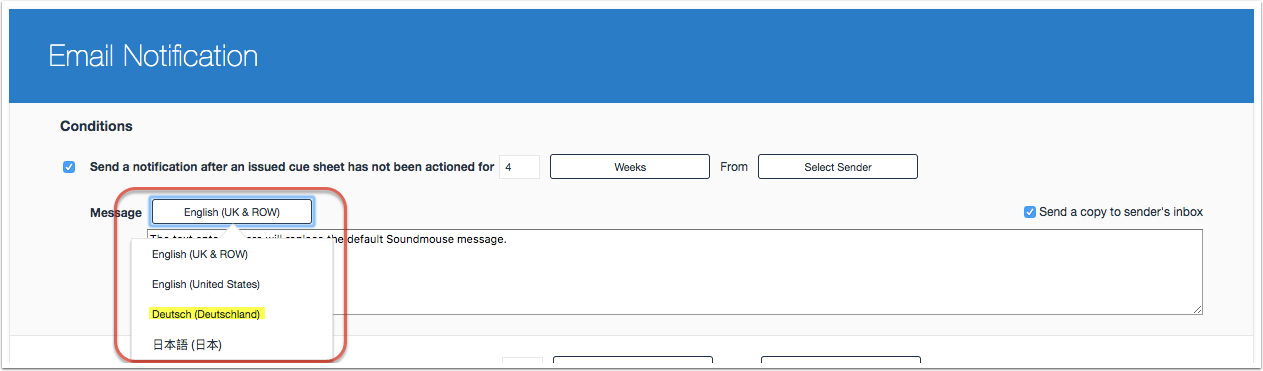
Note: To reinstate the default Soundmouse message simply delete all entered text from the text boxes.
Saving/Activating Email Notifications
Click on Update to save your changes and activate the notification(s).
The time period specified begins after a notification has been set and saved. For example, if the condition is set so that notifications are sent after 7 days of inactivity, that 7-day-clock begins the moment the notification is saved.
Amending Email Notifications
Email Notification conditions can be amended by permissioned users at any time; but the clock is reset the moment Update is clicked.
Disabling Email Notifications
To disable an email notification, simply untick the relevant condition's tickbox.
Comments
0 comments
Article is closed for comments.