Note - When completing cue sheets that originate from Disney, users may note that certain features and functions of the Cue Sheet Module behave differently. This article goes over some of those specific features and functions.
Adding a Cue
Within a cue sheet, add a new cue by clicking on Actions,New Music Cue. Alternatively use the New Cue Keyboard Shortcut by pressing the 'Alt' & 'C' buttons (on Windows) or the 'Option' & 'C' buttons (on MacOS).
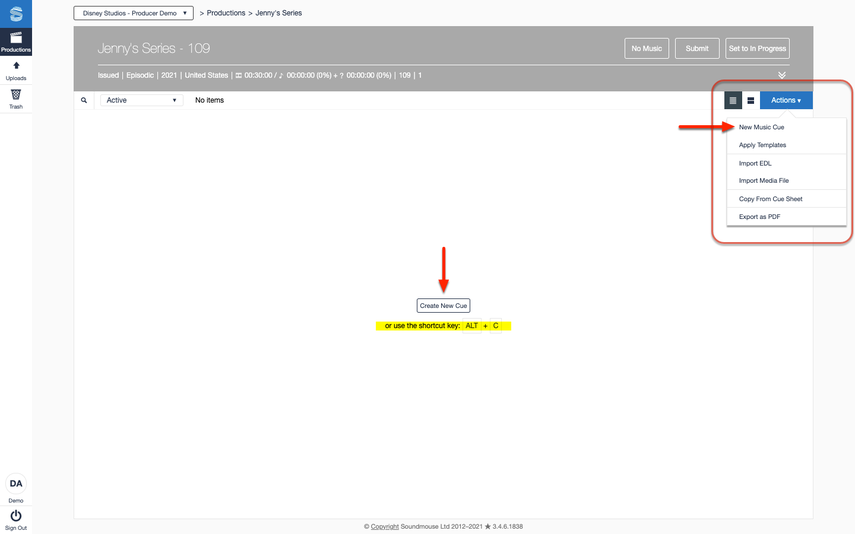
The cue edit form will open in split screen view. If the track is missing mandatory metadata, required information warnings will appear in red. Click on the red number in the upper right corner of the cue edit form for more details about the missing data.
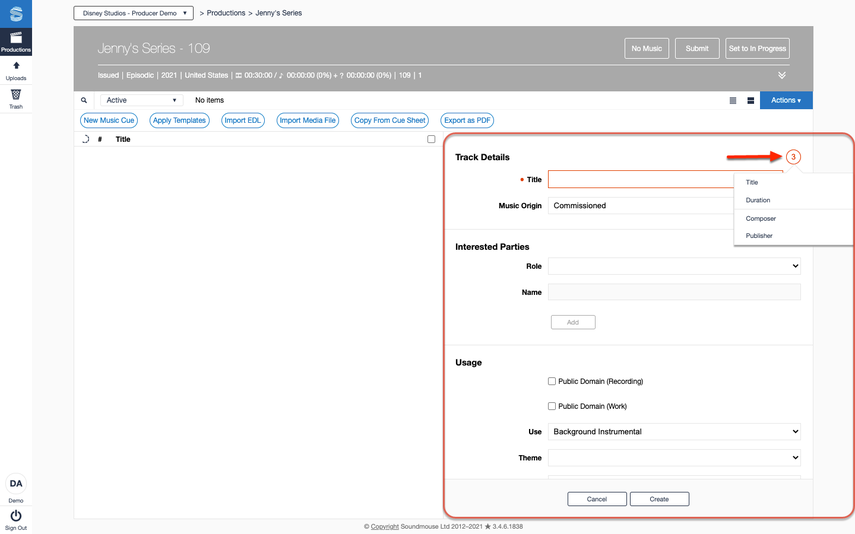
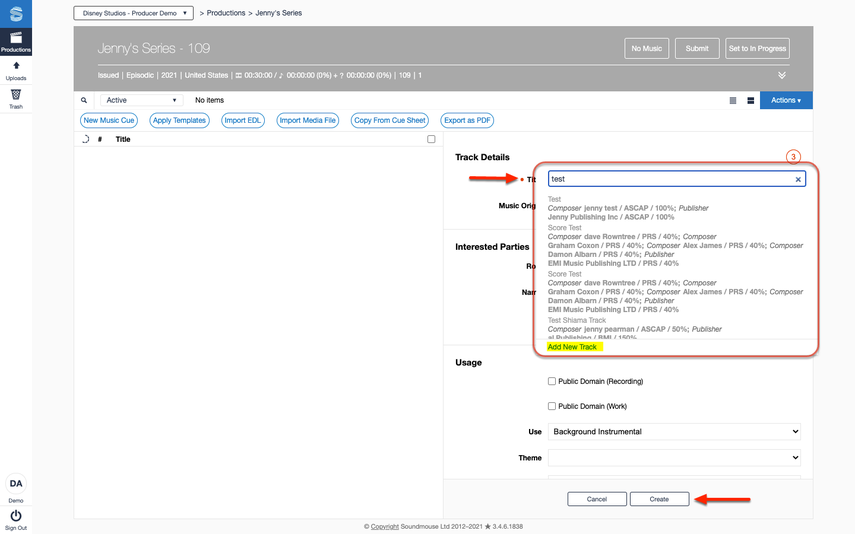
Enter a track title in the text box provided. After entering 3 characters, the system will begin suggesting matching tracks. If the correct track appears, click on it to auto-populate the form with its data. Note: if using a result from the track search, users will still need to specify a duration.
If the correct track cannot be located, click on the option to Add New Track at the bottom of the suggestion box. Provide all mandatory metadata and then click on Create to save and add the cue to the cue sheet.
Adding Interested/Entitled Parties
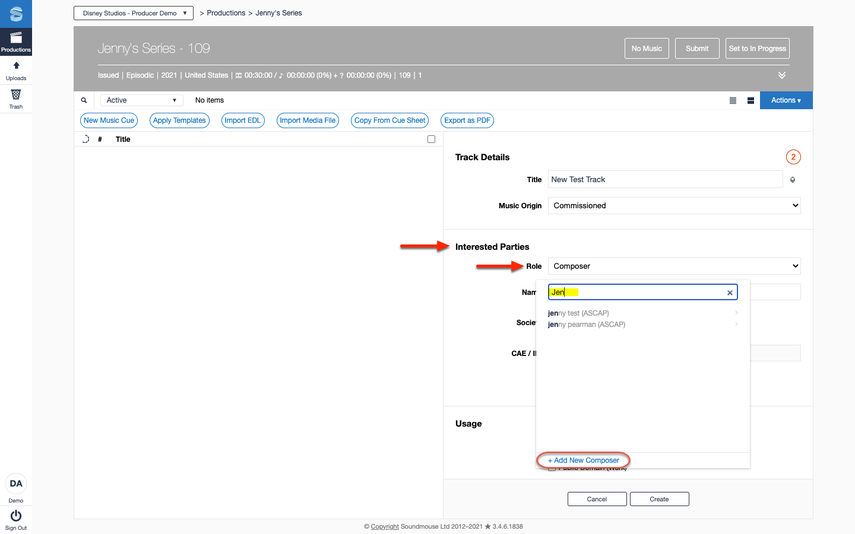
In the cue edit form, scroll down to the Interested Parties segment. Choose a role from the dropdown provided and then enter the name of the interested party in the text box. As with track titles, the system will begin offering suggestions after 3 characters have been entered.
To use one of the suggestions, simply click on it. Otherwise click on + Add New and continue to fill in any required information. Be sure to click on Add to save the info and move the item to the Interested Party list. If the initial role chosen was a writer type (e.g. a composer, lyricist, etc.), users may be prompted to select a corresponding publisher.
Note - Some suggestions may have a blue shield icon located next to them. This means that the result has been verified by Disney and it is the preferred version of the IP. Users should always opt for blue shield IPs when able.
Similarly, when selecting a corresponding publisher, some results may have a chain- link icon next to them. These publishers have been linked to the preceding writer by Disney. Users should select 'linked' publishers when able.
Finally, some search results may have a lock icon located next to them. These IPs have been 'locked' by Disney; their details cannot be edited by users.
Once all IPs have been added, be sure to specify shares if required.
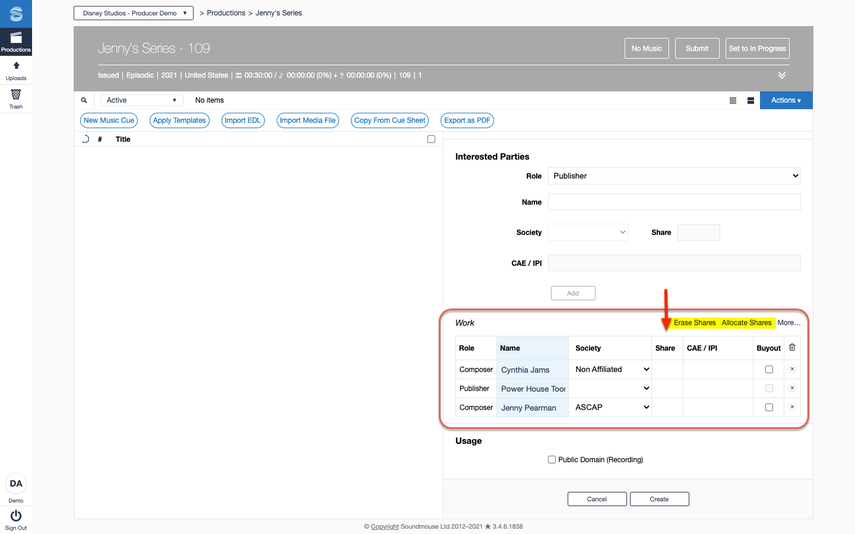
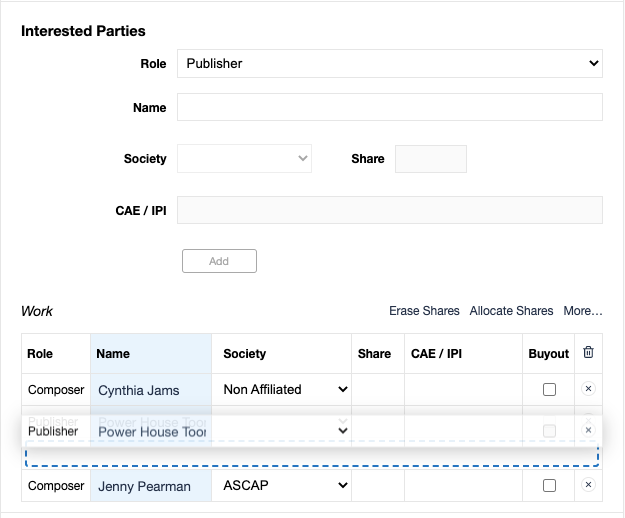
Note - Erase Shares / Allocate Shares: Use the Erase Shares button to remove all share allocations from added IPs and set them as 'empty'. The Allocate Shares button is used to evenly distribute remaining share values among IPs that can have shares but are currently empty.
Note - By default, the system orders Interested Parties in the sequence they were added: the first Interested Party added appears at the top of the list. Users can reorder IPs by simply dragging and dropping them within the list.
Duplicating Cues
If the same track is used multiple times within a cue sheet, make use of the Duplicate Cue functionality. Open the cue in the cue edit form and click on its Duplicate Cue button (located between the cue list and the edit form).
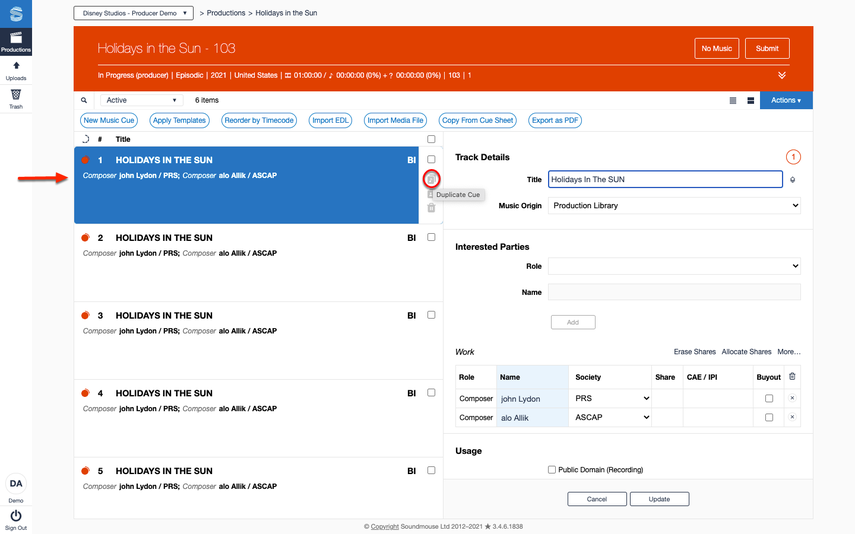
The duplicated cue will appear at the top of the cue list with a red review status indicator. Users must specify the duration of duplicated cues. Click on Update to save.
Duplicating Interested/Entitled Parties
If the same interested parties have worked on multiple tracks within the cue sheet, make use of the Duplicate Interested Parties functionality. Open the cue in the cue edit form and click on its corresponding Duplicate Interested Parties button.

A new cue will appear at the top of the cue list with the duplicated interested party information. Users will then need to enter the track title, as well as use and duration information. Click on Update to save.
Comments
0 comments
Article is closed for comments.